Case Introduction:
Little Lily is a lively and cheerful 7-year-old girl. Her mom noticed that Lily’s upper teeth were sticking out and her bite was a bit off, so she was worried that Lily might get teased at school. After taking her to a dental clinic for a check-up, the dentist recommended braces. After some time, Lily successfully removed her braces and now has a beautiful smile. She’s more confident than ever!
Many parents, like Lily’s mom, have lots of questions about their children needing braces. Braces treatment is a gradual process, involving several steps from the first visit to the final removal of the braces. In this article, we will explain the entire process of children's braces, in simple terms, to help parents better understand and prepare for the treatment.
Step 1: Initial Consultation and Evaluation
The first step in getting braces is visiting a dentist or orthodontist for an initial consultation. During this visit, the dentist will thoroughly check the child’s teeth, jaw, and face. This includes:
- Oral Examination: The dentist will examine the child’s teeth to see how they are aligned and how the upper and lower teeth come together. They will check for any issues like overcrowded teeth, large gaps between teeth, or a misaligned bite.
- X-ray: The dentist will take an X-ray to look at the development of the teeth and jaws, which helps identify any potential problems, such as issues with tooth growth or underlying bone structure.
- Facial Analysis: The dentist will also assess the child’s face and jaw structure to determine whether any surgery or special treatments are needed.
- Record and Plan: Based on the initial evaluation, the dentist will create a personalized treatment plan that includes the expected length of treatment, the type of braces needed, and the frequency of visits.
Step 2: Choosing the Right Type of Braces
Depending on your child’s specific needs, the dentist will recommend the most suitable type of braces. Common options include:
- Traditional Metal Braces: These are the most common and effective option, using metal brackets and wires to gradually move the teeth into the right position.
- Self-ligating Braces: These are similar to metal braces but use special clips instead of elastic bands to hold the wire in place. They tend to be more comfortable and require fewer adjustments.
- Clear Aligners (Invisalign): These clear plastic trays are nearly invisible and are a good choice for children with mild to moderate alignment issues who don’t want the look of traditional braces. However, they might not be suitable for more severe problems.
- Functional Appliances: These devices are used to correct bite issues, especially in children who are still growing. They are often used to guide the jaw into the correct position.
Step 3: The Braces Treatment Process
Once the braces are in place, your child will need to return to the dentist regularly for adjustments. During these visits, the dentist will tighten or adjust the wires to continue moving the teeth. The duration of treatment varies depending on the complexity of the case, but most treatments last between one to two years.
During the treatment, here are a few things to keep in mind:
- Oral Hygiene: Maintaining good oral hygiene is crucial during treatment. Food particles can get stuck in the braces, so it’s important for parents to help their children brush and floss regularly to prevent plaque buildup and tooth decay.
- Regular Check-ups: Your child will need to visit the dentist every few weeks for adjustments. The dentist will track the progress and make necessary changes to the braces.
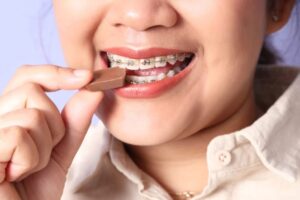
- Dietary Restrictions: It’s important to avoid foods that could damage the braces, such as sticky, hard, or chewy foods. Remind your child to be cautious when eating.
Step 4: Removal of Braces
After a period of treatment, when the teeth are in the right position, the dentist will evaluate whether the braces can be removed. If the teeth have moved into place and the bite is corrected, the dentist will schedule the removal.
After the braces are removed, your child may need to wear a retainer for a while to keep the teeth from shifting back to their original position. The retainer may need to be worn for several months or even years, depending on the dentist’s recommendation.
Step 5: Post-Treatment Care and Retention
Even after the braces are removed, it’s important to continue wearing the retainer to ensure the teeth stay in their new position. Without the retainer, teeth can shift over time, undoing all the progress made during the treatment. The dentist will provide instructions on how long the retainer needs to be worn and how to take care of it.
Key Takeaways: A Confident Smile for Your Child
Braces are not just about making your child’s smile look better. They also improve oral health and help with overall development. By following the correct treatment plan and keeping up with maintenance, your child can enjoy a healthy, confident smile for years to come.